


Gaming Chairs With Headrests: How to Position the Pillow Right
You spent time researching your gaming chair. You adjusted the seat height, dialed in the armrests, and found the right recline angle. But there's a good chance you attached the headrest pillow, sat down, and never thought about it again — and that's where most gamers quietly undo all the ergonomic work they just put in.
A headrest pillow that's even slightly off — too high, too low, or angled incorrectly — doesn't just fail to support your neck. It can actively push your head forward, reinforce poor posture, and compound the very strain you were trying to prevent. Given that your head weighs roughly 10–12 pounds, and that tilting it forward by just 15 degrees can multiply the effective load on your cervical spine several times over, getting the pillow placement right is one of the highest-impact adjustments you can make at your desk.
This guide covers everything you need to know about gaming chair headrest pillow positioning — from the biomechanics behind it, to a practical step-by-step setup process, to the most common mistakes and how to correct them. Whether you're on a Blacklyte gaming chair or building your ergonomic knowledge from scratch, the principles here apply.
Why Headrest Pillow Positioning Actually Matters
The headrest pillow on a gaming chair isn't decorative, and it's not optional padding — it's an ergonomic tool with a specific job. Your cervical spine, the seven vertebrae that make up your neck, is responsible for supporting the full weight of your head across every session. When your head drifts forward even slightly to focus on a monitor, the compressive load on those vertebrae increases dramatically. Research published in Surgical Technology International found that a 15-degree forward head tilt increases the effective load on the cervical spine to around 27 pounds — nearly triple the resting weight. At 30 degrees, that load climbs to roughly 40 pounds.
A properly positioned headrest pillow works against that forward pull. It gives the back of your neck and skull a contact point to rest against during breaks and reclined play, allowing your cervical muscles to decompress instead of working continuously against the weight of your head. The problem is that a poorly positioned pillow can do the opposite — pushing your head forward and locking you into the very posture you're trying to avoid. This is why positioning matters more than most people realize, and why "just attach it to the chair" isn't good enough.
Before You Touch the Headrest: Set Up the Foundation First
Headrest adjustment only works if the rest of your chair is correctly set up first. If your seat height is wrong or your lumbar support is misplaced, you'll be trying to compensate for foundational problems with a single accessory — and that never works. Think of your chair setup as a chain: each adjustment depends on the one below it. The headrest is the final link, not the first.
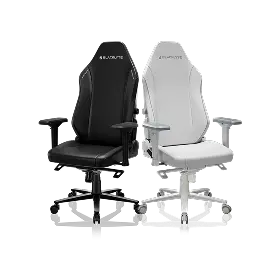
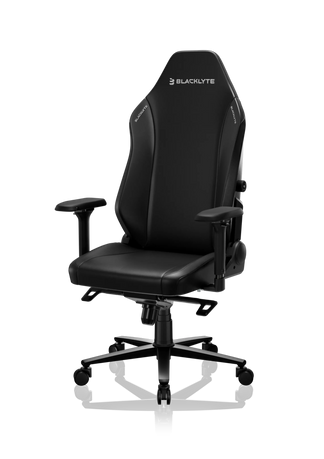
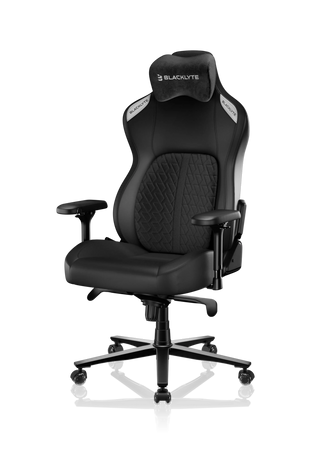
Start from the ground up. Adjust your seat height until your feet rest flat on the floor with your thighs roughly parallel to the ground and your knees at hip level or slightly lower. Next, dial in your lumbar support so it sits just above your beltline, filling the natural curve of your lower back. On the Blacklyte lineup, both the Athena Pro's built-in 4-way adjustable lumbar and the Kraken Pro's floating lumbar with front/back fine-adjust are designed to reach this sweet spot precisely. Only once your pelvis, lower back, and torso are properly supported does your neck naturally settle into a position where the headrest can actually help. Check your ergonomics setup guide for a full baseline before moving on.
Where Should the Headrest Pillow Actually Sit?
This is the question most guides skip over. The short answer: the pillow should cradle the base of your skull — the occipital bone — and the upper portion of your neck, not the mid-neck or the top of your head. When placed correctly, the pillow makes contact with the bony ridge where your skull meets your neck, providing a natural resting shelf that supports your head without pushing it forward or forcing your chin toward your chest.
A common misconception is that the headrest should support the back of the head at its widest point, like a car headrest. Gaming chair pillows work differently. Because they're positioned on a high-back chair designed for various recline angles, the optimal contact zone is lower — at the occiput — so that the pillow supports the natural cervical curve rather than compressing it. If the pillow is sitting at mid-neck height, it's too low. If it's pressing against the top of your skull and forcing your chin down, it's too high. The target is the transition zone between skull and neck, where the curve begins.
Upright vs. Reclined: The Pillow Position Changes
One of the most important things to understand about headrest pillow ergonomics is that the correct position shifts depending on how you're sitting. This catches a lot of gamers off guard. The pillow placement that feels right at a 100–110° recline will often be too far forward when you're sitting more upright — and that difference matters more than most people expect.
When you're sitting upright for focused play or desk work, your head should ideally hover just in front of the pillow, not pressing against it constantly. Think of the headrest as a "catcher's mitt" — it's there to catch your head when you lean back to take a micro-break or decompress between rounds, not to be in continuous contact during active work. Forcing your head against the headrest while you're upright can actually push your neck forward and reinforce the forward head posture you're working to prevent.
When you recline — which is genuinely beneficial for your spine, as it reduces compressive load on your intervertebral discs — the headrest becomes active support. At a recline angle of around 100–120°, the pillow should make comfortable contact with the occipital zone, allowing your neck muscles to relax fully without your head falling back uncontrolled. Blacklyte chairs recline from 90° to 149°, giving you a wide range of active and passive posture positions to work with. The key rule: as your recline deepens, the effective position of your skull shifts, so you may need to slide the pillow slightly upward to maintain that occipital contact.
Step-by-Step: How to Dial In Your Headrest Pillow
Follow this process in order, after you've set your seat height, lumbar support, and recline angle. Rushing straight to the headrest without completing the foundation steps will give you an inaccurate baseline.
-
Sit fully back in the chair — Make sure your entire back, from your lower spine to your upper back, is flush against the backrest. Leaving a gap anywhere in the back chain will shift your natural head position and give you a false target for the pillow.
-
Set your recline angle first — Decide whether you're positioning for active upright work (around 100–110°) or reclined play and relaxation (110–135°). Your target pillow position differs between these modes, so pick the one you use most and optimize for that.
-
Locate the base of your skull — With your back fully against the chair, gently press your fingers along the back of your head until you find the bony ridge where your skull meets your neck. This is your occipital bone — the target zone for the pillow.
-
Slide or reposition the pillow to that height — If your chair uses a strap-and-loop system, thread the strap so the center of the pillow aligns with your occipital zone, not the mid-neck. Tighten the strap until the pillow holds firmly when you lean forward and back. A pillow that slides under pressure is useless as a posture anchor.
-
Check your head position — Sit back naturally and let your head rest lightly against the pillow. Your gaze should be level — not forced downward (chin to chest) and not tilted backward. If your chin drops, the pillow is too high. If your neck feels unsupported in the gap above the pillow, it's too low.
-
Perform the micro-break test — Lean back slightly into a light recline and let your neck muscles relax. Your head should settle naturally into the pillow without you needing to actively position it. If it lands comfortably on the occipital shelf with your gaze still roughly horizontal, your positioning is correct.
-
Fine-tune for your recline depth — If you regularly switch between upright work and a deeper recline, check the contact point in both positions. You may find the pillow is perfect upright but sits slightly low when you're fully leaned back. Adjust to the position that serves your most common usage mode, or develop a habit of sliding it slightly when you change recline depth.
5 Common Headrest Mistakes (and How to Fix Them)
Most gamers make at least one of these errors, and many don't realize it because the discomfort builds gradually over weeks rather than appearing immediately. Check your setup against this list.
- Pillow too high: The most common mistake. A headrest set too high pushes your chin toward your chest, creating strain on the front of your neck and compressing the upper cervical vertebrae. Fix: slide the pillow down until the center aligns with the base of your skull, not the crown of your head.
- Pillow too low: When the pillow sits at mid-neck rather than at the occipital zone, it presses directly into the cervical vertebrae instead of the skull, which can force the head forward or cause localized neck pressure. Fix: move the pillow up until you feel it cradling the bony ridge rather than the soft tissue of the neck.
- Continuous contact while sitting upright: Constantly pressing your head against the headrest during active, upright work can encourage a passive, slumped posture and may even push your head forward depending on the pillow's depth. Fix: treat the headrest as a rest point for breaks and reclined positions, not a constant contact surface during focused play.
- Using the headrest pillow at extreme recline angles: At deeper reclines beyond 120°, a thick headrest pillow can push your head too far forward, working against you rather than supporting you. Fix: remove the pillow or slide it upward to re-establish the occipital contact, or use the seatback alone at very deep recline angles.
- Loose strap attachment: A pillow that shifts under pressure — drifting up during a tense moment or sliding down over a long session — provides inconsistent support and can migrate into a harmful position without you noticing. Fix: tighten the strap until the pillow holds its position when you actively lean forward and back during testing.
Height, Build, and Why One Size Doesn't Fit All
Your height has a direct impact on where the headrest pillow needs to sit relative to the top of the chair's backrest. Taller gamers generally need the pillow higher on the backrest, while shorter users may find the standard position already sits too high — pushing their chin down before a session even begins. This is why adjustability matters so much, and why strap-based systems that let you position the pillow anywhere along the backrest height are worth prioritizing over fixed attachments.
Body proportions also play a role beyond raw height. The distance from your seat to your shoulders, and from your shoulders to the base of your skull, varies between individuals of the same overall height. Someone with a long torso and a shorter neck will have a completely different optimal pillow height than someone with a shorter torso and a longer neck, even if both are the same height standing up. This is why the step-by-step process above starts with finding your own occipital bone rather than relying on a generic measurement. Use your anatomy as the reference point, not the chair's midpoint or manufacturer markings. For guidance specific to Blacklyte's chair models and dimensions, visit our chair comparison page to find the backrest height that best matches your build.
Using the Headrest as a Posture Reset Tool
Beyond passive support during recline, a well-positioned headrest pillow can serve as an active posture correction tool — one that works with your habits rather than requiring you to constantly think about your alignment. The concept is simple: because the pillow is positioned at your occipital zone, the moment you feel contact with it, your head is in a near-neutral position. When you drift forward and the contact disappears, you get immediate tactile feedback that your posture has slipped.
This feedback loop is surprisingly effective. Instead of relying on a timer or a conscious reminder to sit up straight, you can build a habit around periodically leaning back until you feel the pillow engage — a deliberate micro-reset that takes less than three seconds. Over time, that pattern helps retrain your muscle memory toward a more natural neutral head position, making good posture feel less like effort and more like default. Pair this habit with the regular posture breaks and stretching guidance in our Gaming Hub for a complete approach to long-session health.
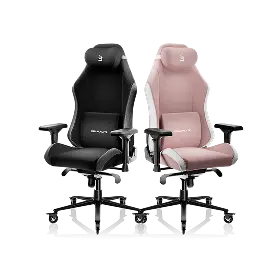
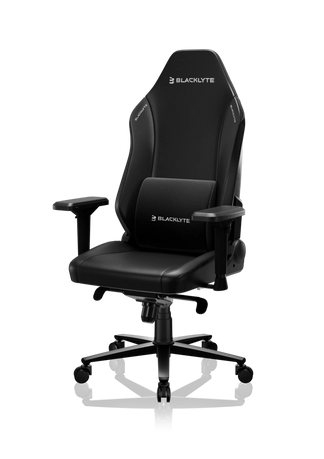
How Blacklyte Chairs Are Built for Headrest Ergonomics
Getting the headrest position right is much easier when your chair's backrest height and overall ergonomic architecture are designed to accommodate a wide range of body types. All three chairs in the current Blacklyte lineup — the Kraken Pro, flagship Athena Pro, and the Athena — feature tall backrests with high-quality contour foam throughout the backrest, giving the headrest pillow a firm, stable surface to anchor against at the correct height for most gamers. Crucially, every model in the lineup ships with a magnetic head pillow rather than a strap-mounted one — a real ergonomic advantage when it comes to the positioning this guide is all about. Because it attaches magnetically, you can lift and reposition it to your exact occipital zone in seconds, and it stays put instead of creeping up or sliding down mid-session the way strap-and-loop pillows tend to. Re-dialing the pillow as you switch between upright play and a deeper recline becomes effortless, which makes consistently correct neck support far easier to maintain.
Each chair also comes equipped with 4D armrests across the full lineup, which plays a direct role in headrest effectiveness. Properly adjusted armrests reduce the amount of weight your shoulders carry, which in turn reduces the unconscious forward lean that compromises neck position — meaning less work for the headrest to undo. The Athena Pro and Kraken Pro both use an aluminum alloy 5-star base for added stability, and all three models are fitted with a Class 4 hydraulic gas piston and a frog-type tilt mechanism with adjustable tilt tension, making it easy to find the recline angle where your headrest pillow performs best. Explore the full chair lineup and compare specifications at Blacklyte Gaming Chairs, or use the chair comparison tool to match a model to your dimensions.
Small Adjustment, Big Difference
Headrest pillow positioning is one of those ergonomic details that takes five minutes to get right and pays dividends across every session after that. The key principles are straightforward: target the occipital zone rather than the mid-neck or crown, use the pillow as active support during recline and a passive reference during upright play, adjust for your specific body proportions rather than a generic default, and always build your headrest setup on top of a properly adjusted seat height, lumbar position, and recline angle.
If your neck feels stiff after long sessions despite having a headrest pillow, work through the five common mistakes listed above — chances are the fix is one small adjustment away. And if you're still putting up with a chair that doesn't give you the adjustability you need to get this right, that's a problem worth solving at the foundation level. The right chair makes every other ergonomic decision easier. For a full overview of Blacklyte's ergonomic approach to both gaming and work, visit our Ergonomics page and Gaming Hub.
Need Help Dialing In Your Setup?
Whether you're unsure which Blacklyte chair fits your dimensions, want to compare models side by side, or just have questions about ergonomic configuration, our team is ready to help. We back every chair with fast free shipping, 30-day easy returns, and warranties extendable up to 5 years — so you can set up with confidence.


